


For a motorcyclist, the chain is more than just a piece of metal; it is the vital link that transfers power from your engine to the rear wheel. Despite its importance, it is often one of the most neglected components. A poorly maintained chain can not only ruin your riding experience but can also become a significant safety hazard.
In this comprehensive guide, we will break down chain maintenance into 5 simple steps to keep you riding safely and extend the life of your drivetrain.
Why Chain Maintenance is Important
Before grabbing your tools, let’s understand the stakes. Why spend time getting your hands dirty?
-
Enhanced Safety: A chain that is too loose can jump off the sprocket and lock the rear wheel. Conversely, a chain that is too tight can snap or damage the output shaft bearings.
-
Performance & Smoothness: A properly adjusted chain makes gear shifts smoother and throttle response more precise.
-
Cost Savings: A high-quality chain and sprocket kit is an investment (often costing $200–$400 with labor). Regular maintenance can double its lifespan, taking it from 10,000 miles to over 20,000 miles.
-
Fuel Efficiency: Less friction means more power reaches the ground, optimizing your fuel consumption.
Tools Needed for Chain Maintenance
You don’t need to be a MotoGP mechanic to maintain your chain, but having the right tools makes the job much easier:
- Paddock Stand: To lift the rear wheel (essential if you don't have a center stand).
- Torque Wrench: To tighten the axle bolt to the manufacturer's specific torque settings.
- Wrenches/Sockets: To loosen the axle nut and adjust the tension bolts.
- Ruler or Tape Measure: To measure the "slack" (tension).
- Chain Brush & Cleaner: To remove old grit, road salt, and grime.
- Quality Lubricant: Spray, wax, or paste depending on your preference.
- Clean Rags: To wipe away excess cleaner and lube.
Here Are 5 Steps to Check & Adjust Your Motorcycle’s Chain
Step 1: How to Check for Chain Wear & Tension
The first step is diagnosis. Is it time to adjust, or is everything in spec?
Measuring the Tension (The "Slack")
Tension is usually measured at the midpoint between the front sprocket and the rear sprocket.
-
Position the Bike: Place the bike on its side stand (or paddock stand, depending on your manual's instructions).
-
Find the Center Point: Push the chain up, then pull it down at the middle of the bottom run.
-
Measure the Distance: The total travel (up/down play) should typically be between 25mm and 40mm (approx. 1 to 1.5 inches).
Checking for Wear (Tight Spots & Stretching)
-
Tight Spots: Rotate the wheel slowly. If the chain feels tight in some sections and loose in others, you have "tight spots." This means the O-rings have failed.
-
Stretching: Try to pull the chain away from the back of the rear sprocket. If you can see more than half a sprocket tooth, the chain is excessively stretched and needs replacement.
Step 2: Step-by-Step Guide to Adjusting Chain Tension
If your measurement is outside the recommended range, it’s time to adjust.
-
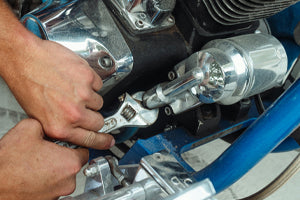
Loosen the Rear Axle Nut: Use a large wrench to loosen the axle nut. You don’t need to remove it; just loosen it enough so the wheel can slide.
-
Adjust the Tensioners: Turn the adjustment bolts (located at the end of the swingarm) in small increments (1/4 turn at a time).
-
Alignment is King: This is the most critical part. Ensure the alignment marks on the swingarm are identical on both sides. A misaligned wheel causes premature wear and dangerous handling.
-
Tighten the Axle: Once the tension is perfect, tighten the axle nut. Always use a torque wrench. Over-tightening can crush bearings.
-
Final Check: Tension often changes slightly after tightening the axle. Measure the slack one last time.
Step 3: Cleaning & Lubricating the Chain
A clean chain is a happy chain. Never apply new grease over old road grime.
The Cleaning Process
Spray a dedicated chain cleaner (or kerosene) onto the chain. Use a three-sided brush to scrub all sides of the links. Wipe it down with a rag until the metal is clean and dry.
The Lubrication Process
-
Apply the lubricant to the inside of the chain (the side that contacts the sprockets) while rotating the wheel manually.
-
Pro Tip: Lubricate after a ride when the chain is warm; the heat helps the lube penetrate the O-rings.
-
Let it sit for at least 15–30 minutes before riding to prevent "fling-off" on your rims (and your tire!).
Step 4: When to Replace Your Motorcycle Chain
All chains eventually reach the end of their life. Look for these "red flags":
-
Hooked Teeth: If your sprocket teeth look like shark fins or are pointed, the entire kit (chain + sprockets) must be replaced.
-
Excessive Rust: If rust has penetrated the internal pins, structural integrity is compromised.
-
Kinked Links: Links that stay in a "V" shape even when moving indicate seized pins.
-
Maxed Out Adjusters: If your adjustment bolts are at the end of their travel, the chain is too stretched to be safe.
Step 5: Daily Best Practices
To maximize your investment:
-
Check the tension every 800 to 1,000 km (approx. 500–600 miles).
-
Lubricate every 500 km (approx. 300 miles) or after every ride in the rain.
-
Keep an eye on the condition of the sealing rings (O-rings/X-rings).
Taking care of your motorcycle chain might seem tedious at first, but it quickly becomes a therapeutic routine for any enthusiast. By following these steps—checking, adjusting, cleaning, lubricating, and inspecting—you ensure your safety and save hundreds of dollars in the long run.
Remember: A great ride starts with a drivetrain in peak condition. Grab your tools and hit the road!